


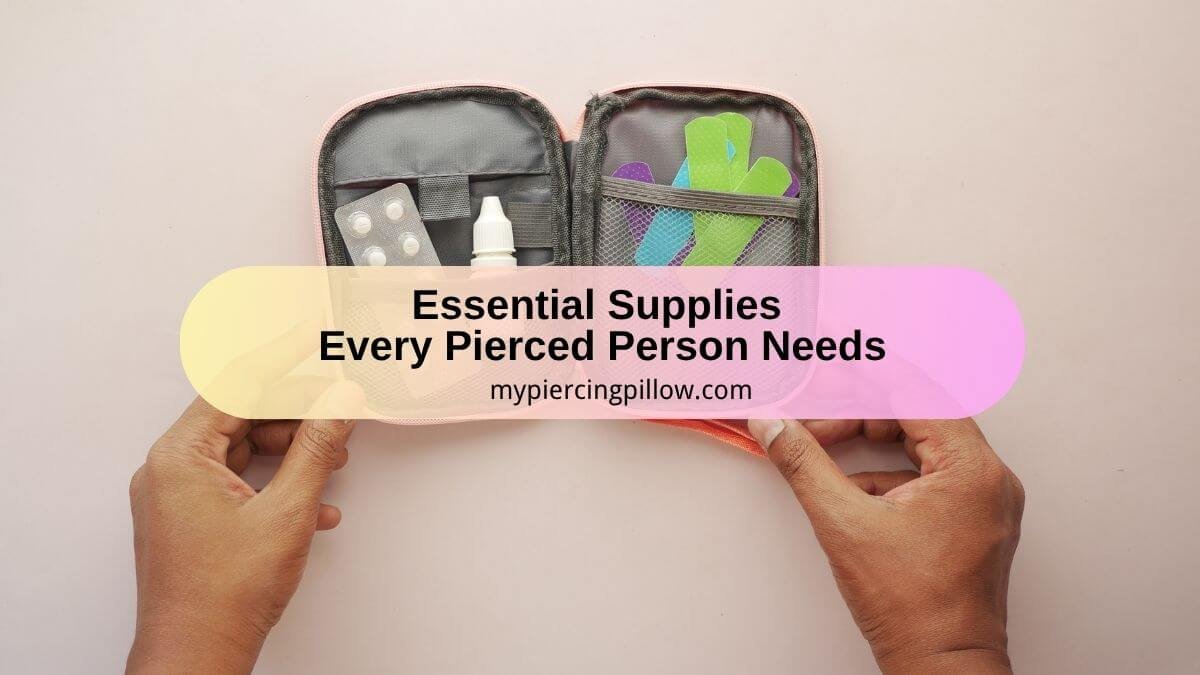
A piercing emergency kit is what I call all the supplies you might need as a pierced person. Most of these items are nice to have, but some are absolute essentials that every pierced person should keep at home.
Best Saline Solution for Piercings: Neilmed vs Oatsy
The number one thing that I think is non-negotiable and that everybody who has piercings should have at home in some form or another is saline solution. This is the foundation of proper piercing aftercare.
My personal favorite is the Neilmed Piercing Aftercare. I also use the Oatsy by Easy Piercing when I can’t get my hands on the Neilmed, which is the case right now. So I’m using the Oatsy one currently.
The reason I prefer Neilmed is because of the nozzle design. It has a different kind of spray pattern. The Neilmed has a stronger spray that definitely feels like pressure washing your piercings a little bit. The Oatsy has more of a broader spray versus the Neilmed, which is more precise. Both work effectively, but the spray pattern makes a difference in how you can target specific areas.
The way more important thing than brand preference is making sure that it is only saline. You need to make sure it is sterile isotonic saline for piercings and it has absolutely nothing else in it. No tea tree oil, no alcohol, no essential oils, nothing. Just saline solution. Anything else is going to irritate your piercings in the long run.
How to Clean Piercings at Home with Saline
You should be using saline solution to clean your piercings at least once a day. This applies even if they’re healed, even if you’ve had them for years. I didn’t do this for a really long time because I was just convinced that after the initial healing period, you didn’t have to take care of your piercings. But that’s just not true.
The saline spray is a no-brainer, but it is still hands down the fastest way to help calm down irritated piercings and not cause more harm in the long run. Think about alternatives like tea tree oil or aspirin paste. Don’t put any of that on your piercings.
Just use saline spray and listen to your piercers. Don’t take advice from people who recommend tea tree oil or aspirin paste, even if they are your piercer. That’s just a sign you should find a different piercer.
Spare Piercing Jewelry: Building Your Backup Collection
The second thing that I think everybody should have in their piercing emergency kits is spare jewelry. I have a huge box of spare piercing jewelry. You obviously don’t need this much. The amount you need honestly depends on the number of piercings you have.
How Much Spare Jewelry Do You Need?
If you have two or three piercings, just get a replacement for each one in the correct thickness. If you have many, many piercings, you could probably get away with only getting one of each gauge, or one or two of each gauge. It really depends on how many piercings you have.
If you have more than two or three piercings, chances are you probably already have a good amount of jewelry at home anyway. What I like to do is keep the initial jewelry when I go in for my downsizes. Studios usually just let you keep it anyway, but if they don’t, just ask. This way you have something that fits in whatever emergency if you lose a ball or what have you.
If you have a lot of piercings, or you’ve had your piercings for a couple of years, you will just naturally start to accumulate extra jewelry just from switching to a ring or switching to a circular barbell or switching from silver to gold. All of those scenarios are going to leave you with extra jewelry.
How to Store Extra Piercing Jewelry
I think it’s always helpful to have a backup. If you have enough extras and you’re out and about a lot, it can also be helpful to have one or two attachments or labret posts in your wallet, your purse, whatever you carry. Just having extra jewelry is always good. You don’t need to go overboard like I have. You also don’t need an organizer.
I’ve seen a couple of people who have those bead storage containers for their piercing jewelry storage ideas. I wish I was that level of organized. I’m just not. I don’t think I’ll ever be. I just store all my things in little baggies. At least it’s come to the point where everything is separated by category. So that’s a win for me. That’s a huge step forward. But having extra jewelry organized in some way works well.
Grip Tools: Latex Gloves and Hemostats for Jewelry Changes
The next thing in my piercing emergency kit is rubber gloves. These are tools that help you manipulate piercing jewelry grip tools when you need to change or adjust pieces.
Latex Gloves vs Nitrile for Piercing Jewelry Grip
If you can, I highly recommend going for latex versus nitrile. These are nitrile gloves. They’re usually a little thinner and less stretchy. That’s the main difference if you’re not familiar with your gloves.
The reason I would recommend latex over nitrile is just because nitrile gloves are a little bit more slippery. The reason I would suggest you have rubber gloves in your piercing emergency kit in the first place is to help you grab jewelry and twist off balls or hold balls and labret posts and rings and whatever.
They are really just for grip on your piercing jewelry if you need to change something or take something out or whatever.
Nitrile gloves, don’t get me wrong, they get the job done. They’re better than just your fingers. Top tier, best grippy thing ever, are latex gloves for piercing jewelry. In a pinch, a tissue will also work just like a normal piece of tissue to help grab attachments and clickers and all those fun things to open your piercings.
How to Use Hemostats for Piercings
Next up in the same sort of category are hemostats and ring openers and closers. These are definitely not something that I would label as an absolute complete essential. All of these are very much just nice to have.
Hemostats would come right after rubber gloves on the ranking if you were to ask me. Again, these are helpful for holding your jewelry to help keep it steady and have a counterpart if you’re screwing something in.
These come in a variety of different ends. If you click them, they lock. So they don’t open, right? Usually they’re open, and if you click them, they stay closed. That’s not something, by the way, I would recommend you do. Don’t close these completely. I’ve yanked a good few of my piercings, most of which were already irritated, because I forgot I closed these.
I have the super thin ones. They’re also a little bit curved. These are really good for super close fitting jewelry. I don’t have a lot of those types. I can usually get in between my skin and the labret post with the regular hemostats with no issues. But I know some people prefer a super close fit. So for them, I would recommend the thin curved ones.
Hemostats grab onto your rings, your labret posts, whatever you’re working with. They help you hold them so you can put on your attachment or take off your attachment. These are actually way more helpful for internally threaded jewelry versus threadless.
I don’t find that I need these as much with threadless jewelry when considering threadless vs internally threaded jewelry tools. They can still be helpful. Even if you have all threadless jewelry, they can make things easier.
Ring Openers for Thick Piercing Rings
Ring openers and closers are in that nice-to-have category. Ring openers traditionally don’t look like the ones I have. Most of the time they have grooves down the side to help them not slip from the ring.
What these are is essentially like pliers, but when you squeeze them together, they open. So if you have a thick ring or a larger gauge ring or a clicker or anything similar, these are useful. I use this mostly for my septum clicker because it’s 4.5 mm. You just put it in the ring and you push and then it will open your ring. These are helpful tools.
I don’t think I could use this ring or open this ring without these ring opener for thick piercing rings. If you have thicker rings in any of your piercings that aren’t circular barbells, but they’re closed rings, ring openers for sure are useful.
I don’t have ring closers because I don’t find them necessary for clickers. They’re mostly helpful for captive bead rings or segment rings, neither of which I use just because I like being able to put in and take out my rings all on my own. I just haven’t been able to do that ever with either of those ring styles. So ring openers are very good, very helpful, but absolutely not an essential.
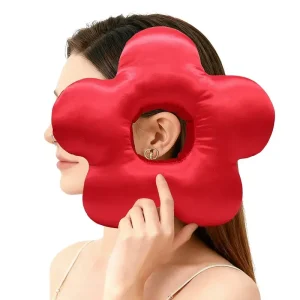
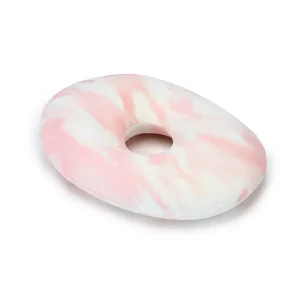
Piercing Pillow for Side Sleepers: Plus DIY Alternatives
I genuinely almost forgot to include this one, but it’s a piercing pillow. If you’re a side sleeper and you have fresh ear piercings or just in general ear piercings that you shouldn’t sleep on, a piercing pillow for side sleepers is helpful. You just put your ear through the hole and then you can sleep on your side.
Using a Piercing Pillow: Fitting and Benefits
-
Donut Memory Foam Piercing Pillow
Original price was: $89.00.$79.00Current price is: $79.00. -
Donut Piercing Pillow
Original price was: $59.90.$39.90Current price is: $39.90. -
Memory Foam Piercing Pillow
Original price was: $99.00.$89.00Current price is: $89.00. -
Piercing Pillow for Side Sleepers
Original price was: $120.00.$99.00Current price is: $99.00.
As you may or may not know, I’m not a huge ear cartilage piercing person. So I did almost forget this item. But I sleep on this every night since I repierced my second set of lobes because they’re in cartilage territory. It helps so much. Also with my conch stretches, this pillow has been essential.
I do put a pillowcase on it and I make sure the pillowcase is a little bigger. In this case, it’s a lot bigger, but I just fold the excess and then make a hole in it and then I can sleep comfortably. I just make a hole in the middle where the hole is and then I can still sleep on it and change the case so that I don’t get acne on the side that I sleep on.
I’ve also seen people on Reddit specifically recommend using t-shirts instead of pillowcases and just threading the armhole through the pillow hole so that you can change it again and don’t have all the sweat and the bacteria right in the pillow.
DIY Alternatives: Travel Pillows and T-Shirt Tricks
If you don’t want to or can’t buy a piercing pillow, you can also use a travel pillow and just lay on that as alternatives to piercing pillow. It works the same. It slips around sometimes, but for the most part, it does the same thing.
I used a travel pillow for two or three months before I got this piercing pillow because I didn’t want to invest in one. I thought my second set of lobes was going to heal sooner, and I could sleep on my side way sooner. That didn’t happen. I still need to sleep on the piercing pillow, and it’s been six months.
Another alternative if you don’t have a travel pillow either is to just take a scarf or a rolled up t-shirt and roll it up. Ideally, it should be a little thicker than a typical rolled pillowcase, but you get the idea. Then you can either position it so there’s a hole in the middle. If you have a scarf, you can also make a knot so it doesn’t open up as easily.
The scarf or blanket situation I have tried and it works if you’re in a pinch, but I would definitely recommend if you have the extra money for one to just get one of these because it’s so much simpler.
These are not a must. I wouldn’t call them an essential, but they are so nice to have. I love this pillow. It makes sleeping with healing piercings so much more comfortable.
Supplies for Fresh Piercings: Cotton Swabs and Pain Relief
These last two things I’m going to talk about are more for new piercings. I feel like everything I’ve covered so far has just been for overall piercing purposes and not necessarily only for fresh piercings. These next two are mostly for fresh piercings.
The next thing I’m going to be talking about are Q-tips and cotton balls or cotton swabs. Cotton swabs are Q-tips, whatever you want to call them. Q-tips are for cleaning your piercings and gently removing the crusts. Cotton balls are mostly for soaking with saline.
You can do saline soaks or chamomile soak for piercings without having to stick your entire head in a bucket of chamomile tea or saline solution. You can use cotton swabs for piercing care to gently clean around the piercing site and remove any buildup. The cotton balls work well when you saturate them with solution and hold them against the piercing for a few minutes.
The very last thing in my piercing emergency kit are painkillers. I think these are pretty self-explanatory. You always think you don’t need them until you need them and then you need them badly. So I just like having them around.
These aren’t just for piercing related things obviously, but they are also quite nice to have when one of your piercings acts up and it’s Sunday night or the night before a holiday or something and nothing’s going to be open. Having pain relief for irritated piercings available at home can really help you manage discomfort until you can see your piercer.
Those are all the things that I keep in my piercing emergency kit and all the things that I would recommend you have in yours if you’re thinking about maybe making one. Building your own kit with these piercing care supplies to have at home ensures you’re prepared for any situation that might come up with your piercings.
-Thanks to our customer Sophie for sharing! Hope this helps with your piercing healing.