


Do you have a cartilage piercing and struggle with being a side sleeper? Have you tried sleeping on your back, only to wake up in the morning with your ear hurting because you moved during the night?
I understand this problem well because I’m a side sleeper too. When I got my cartilage piercing, I knew I would have trouble sleeping comfortably. I needed to figure out how to protect my pierced ear while still getting quality sleep.
About a week before getting my ear pierced, I developed a simple DIY solution. This method has seriously helped me sleep comfortably with my new cartilage piercing. It might seem a bit unconventional, but it works. This ear piercing sleep solution can help you too.
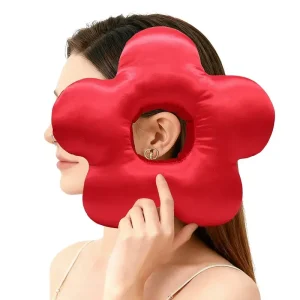
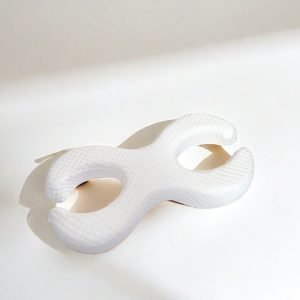
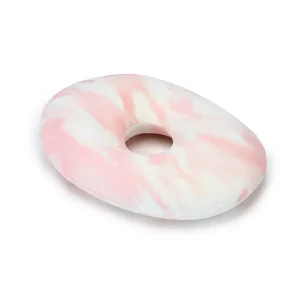
But if you prefer an easier solution, you can simply buy a piercing pillow.
-
Donut Memory Foam Piercing Pillow
Original price was: $89.00.$79.00Current price is: $79.00. -
Donut Piercing Pillow
Original price was: $59.90.$39.90Current price is: $39.90. -
Memory Foam Piercing Pillow
Original price was: $99.00.$89.00Current price is: $89.00. -
Piercing Pillow for Side Sleepers
Original price was: $120.00.$99.00Current price is: $99.00.
DIY Ear Protection Solution: The Sponge Method
This protect cartilage piercing while sleeping method requires just four simple materials: a piece of paper, a pencil, a sponge, and a bandana stretchy enough to fit over your head. The sponge trick for cartilage piercing creates a protective barrier around your ear without putting any pressure on the piercing itself.
The concept is simple: you cut a hole in a sponge that fits around your ear. The sponge provides cushioning and creates a protective space. The bandana holds everything securely in place overnight.
Creating Your Cartilage Piercing Sleep Protector
Step 1: Create Your Template
Get your piece of paper and draw a circle roughly the size of your ear. Cut out this circle. The circle should be big enough to cover your ear comfortably. Make sure you give a little extra space around the top of the ear so it’s not too tight.
Step 2: Prepare the Sponge
Choose a sponge that fits the size of your head and isn’t too soft. You want a sponge that won’t compress too easily when you put pressure on it. A sponge with a rougher backing works well because it provides more resistance.
Place your paper template on the soft side of the sponge. Position it more toward the center of the sponge, not too low or too high. Use a pen to trace a circle around your template. This marks where you’ll cut.
Step 3: Cut the Opening
Take a pair of scissors and carefully cut into your sponge following the traced circle. Cut all the way through to create an opening. You should now have a nice circular hole inside your sponge that fits around your ear.
Step 4: Test and Adjust
Place the sponge over your ear so the opening surrounds your cartilage piercing. The sponge should sit comfortably without touching the piercing. Hold it in place and put the bandana over your head to secure it.
Using Your Ear Protection at Night
The finished sponge protector is comfortable and adjustable. As long as it’s secure and held in place, you can trust that it will protect your ear throughout the night. Whether you toss and turn frequently or just move your head occasionally, the bandana keeps the sponge in position.
This method helps prevent cartilage piercing irritation overnight by eliminating direct pressure on your ear. You can finally sleep comfortably with new piercing without worrying about pain or complications. You can also use an ear piercing pillow.
The beauty of this DIY approach is its simplicity and effectiveness. It allows side sleepers with ear piercings to maintain their natural sleeping position while protecting their healing cartilage piercing.